on orders over £50

Winter Wonderland

Winter Wonderland – Double Layout
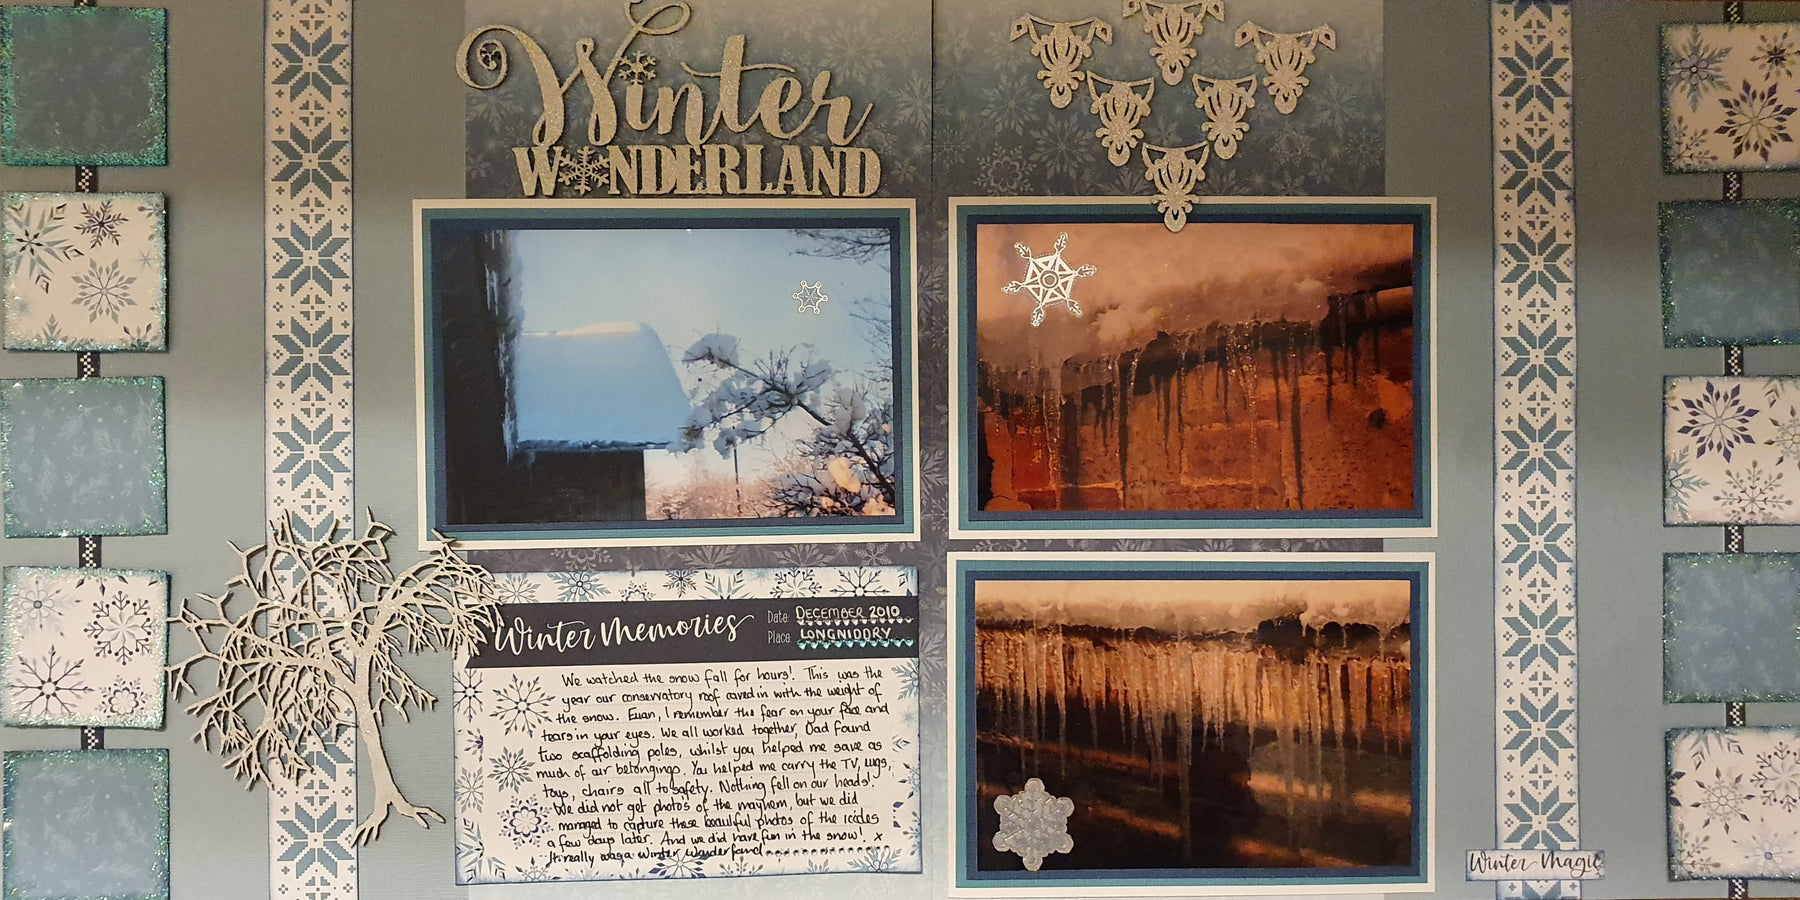
With all this snow and frost we have recently had, this Winter Magic kit inspired me to look out some photos from the hard winter of 2010! A time my family and I will never forget. It was the 5th of December, we were due to attend an evening wedding reception and whilst we were getting ready, our conservatory roof started to come down with the weight of the snow. The three of us worked together and within a few hours we had saved our furniture and secured the roof from coming down completely. We did not have photos of the chaos but days later we managed to picture the most beautiful icicles around our house. Something we really do not see often in East Lothian and thought I really should scrap. So here is my simple double layout.
Base – 2 sheets of Coastal 12x12”, using one sheet of Icy Snowflakes I cut this to 2 sheets of 12x6”. I placed these in the middle of the layout. I cut out ten pieces of 2x2” squares using a sheet of the Magic Snowflake paper. Using the 4x6 Journaling Card paper, I cut 2 strips of the snowflake design, blue on white and I then cut 2 strips of the narrow-chequered pattern, white on blue. Using the narrow pieces first, I placed them 1” from each edge of the layout. With my 10 2x2” squares – using 5 of each side, I inked all around using distress ink – Faded Jeans. After inking, I then used my Zig 2-way Glue Pen and gently covered all around the edges. I then covered the edges with Glamour Dust glitter. By using the ink first, this created a lovely blue shade under the glitter. I then placed these down the strip using some glue dots. I used the glue dots because I wanted the pieces to be floating and not stuck down.

I then inked the Snowflake strips and placed these 2” apart from the chequered strips.

My 3 photos used for this layout, I cut down to 5 ¾ by 3 ¾. I used Avalanche for my first matt 4 ½” x 6 ½”, Rain for my second matt 4 ¼” x 6 ¼” and Typhoon 4 x 6” for my third. Once all stuck together, I placed the photos onto my Icy Snowflake base.

I cut the Winter Memories journaling card from the 4x6 Journaling Card paper. I inked this too using Faded Jeans, added my journaling and the rhinestones from the kit. I placed this on my layout with glue dots.
For my embellishments, I covered the chipboard snowflake provided in the kit with Impasto White Paint and before it was dry, I covered with Glamour Dust. Once all dried I cut snowflake into 6 pieces and added this to top right of my layout.

I did the same with Dusty Attic Mini Bare Tree #2 and my Winter Wonderland title. I placed these onto the first page of my layout with 3D gloss gel.


To finish off, the snowflake transfers provided with the kit I added a few to my photographs. All finished and very sparkly!
Extra Items Used
Dusty Attic Winter Wonderland - DA1470
Dusty Attic Mini Bare Tree #2 - DA0183

Comments
Leave a comment