on orders over £50

Giant Lanterns by JACKIE BURTON
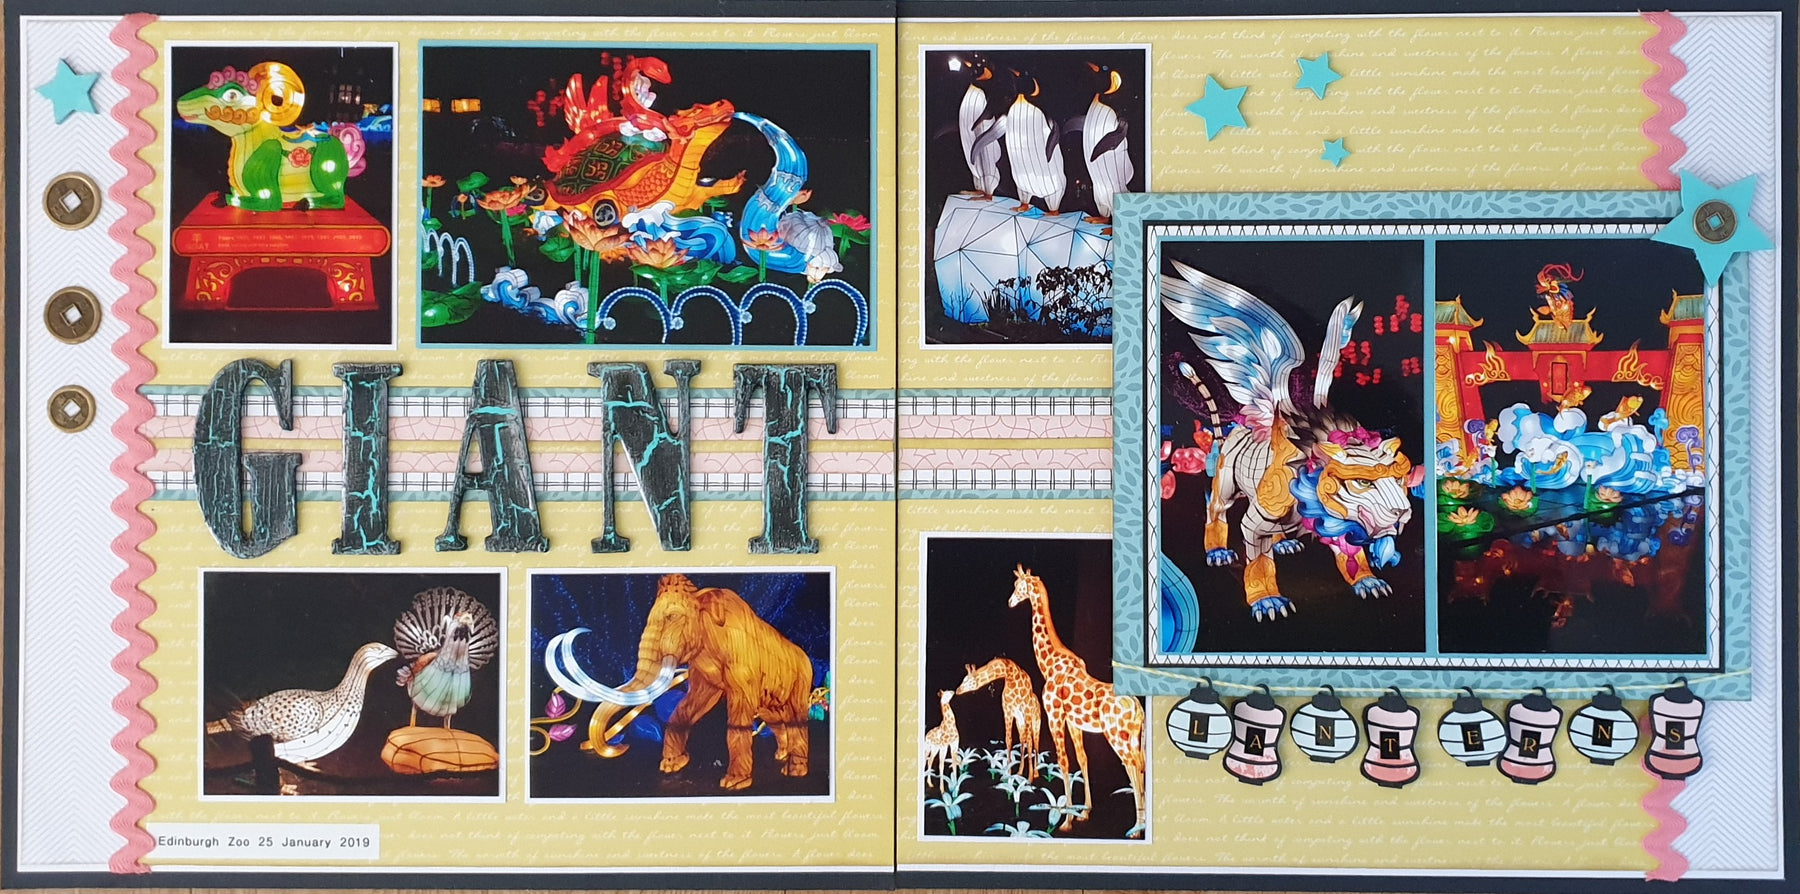
Janine chose nice spring colours this month, but I just could not find any of my spring photos that I thought would work with the papers. So, in the end I opted for some of my photos from the Giant Lanterns at Edinburgh Zoo. We have been twice 2018 & 2019 and I hope they have them again as I think they are one of the best light displays around The Festive season.

I used one 6”x4”, 2 x 3.5”x 5.5”, 2x 4”x3” and 2x 3”x4” photographs and took inspiration from a Dusty Attic sketch. I matted the small photos on white cardstock leaving a 1/16” border all around and the larger photos onto Whirlpool cardstock, with the two 3.5”x 5.5” on the same mat. Again, leaving a border of 1/16”. I then matted this onto a piece of Sweet Flowers no 63 measuring 7½”x57/8” which gave a border of ⅛” all around. Next onto a piece of raven cardstock 75/8”x6” giving another border of 1/16” and finally onto a piece of Sweet Flowers no 62 measuring 8⅜”x6¾”.
I used 2 x raven cardstock as my base and then layered white cardstock on top cut to 11¾” x 11½ to create a ¼” border on three sides. Next layer was Sweet Flowers no 61, 2x 10¼”x11⅜” and Sweet Flowers no 60, 2 x 17/16” x11⅜”. For my centre strips I used Sweet flowers no 62, 2 x 10¼”x1½”, reverse side Sweet Flowers no 61 2 x 10¼”x1”, reverse side Sweet Flowers no 62 2 x 10¼”x¾” and Sweet Flowers no 61 2 x 10¼”x⅛” layered these together and centred on to the yellow Sweet Flowers no 61. I then placed my photos ¼” from the top and right side on the left-hand page leaving a space of ¼” between the larger and smaller photo. I then placed the two 3”x4” photos a ¼” from the top, bottom and left-hand side. I placed the ricrac along the seam where Sweet flowers no 61 and Sweet Flowers no 60 met on both sides of the layout. I then cut a piece of chipboard to go under the two matted photographs to raise if off the layout and added this, so it slightly overlapped the two photos on the left-hand side and centred it top to bottom.

For my title I painted my chipboard letters with the Patina paint, but I felt they were too bright, so I covered them with a thin layer of crackle glaze and once dry painted with black. The crackle glaze allows the black paint to develop cracks and the green show through. I then gave them a coat of satin glaze. To tone the black down I gently added Old Silver Art alchemy Metallique wax once the satin glaze was dry. I added these to the left-hand page. I cut some lanterns from raven cardstock and reverse side of Sweet Flowers no 60 and 63. The added small letters to finish the tile. I then strung these onto a piece of yellow twine securing to the twine at the top of the hoop, so they still had movement and added this to the bottom of the photo mat.

I finished off by painting my stars with the Patina paint and then once dry spritzing with Glimmer Mist (White pearl) to give them a sheen. I then added these and some Chinese coins to the layout.
Products Used:
March Scrapaholix Kits - Sweet Flowers — The Mad Scrapper
Extra cardstock & patterned paper used:
2 x Bazzill - Raven/Canvas — The Mad Scrapper
2 x American Crafts cardstock - White — The Mad Scrapper
2 x Sweet Flowers 61 patterned paper
The Dusty Attic Chipboard - Stars #1 — The Mad Scrapper
Tim Holtz Mini Distress Ink Pad - Frayed Burlap — The Mad Scrapper or Tim Holtz Distress Ink Pad - Frayed Burlap — The Mad Scrapper
Mini Ink Blending Tool 1" Round — The Mad Scrapper
Scor-Tape - 1/4" Double Sided Tape — The Mad Scrapper
Scor-Tape - 3/8" Double sided Tape — The Mad Scrapper
Finnabair Art Basics 3D Gloss Gel — The Mad Scrapper or 3D GLOSS GEL – 2OZ TUBE — The Mad Scrapper
Art Alchemy - Old silver wax — The Mad Scrapper
Jillibean Soup Twine - Bean Stalks Twine 20yds - Orange/Yellow — The Mad Scrapper
From my own stash:
Crackle Glaze
Satin Glaze
Chinese Coins
3D adhesive dots – Zots. Janine no longer has these, but I assume these will be similar - Adhesive Dots Roll - 3D — The Mad Scrapper
Maya Road chipboard letters Janine used to have these, but I see that they are not available now.

Comments
Leave a comment