Hi there.
Well today is the day I have to officially accept I am a scrapbooker as I just bought and decorated my second 12x12 layout album.
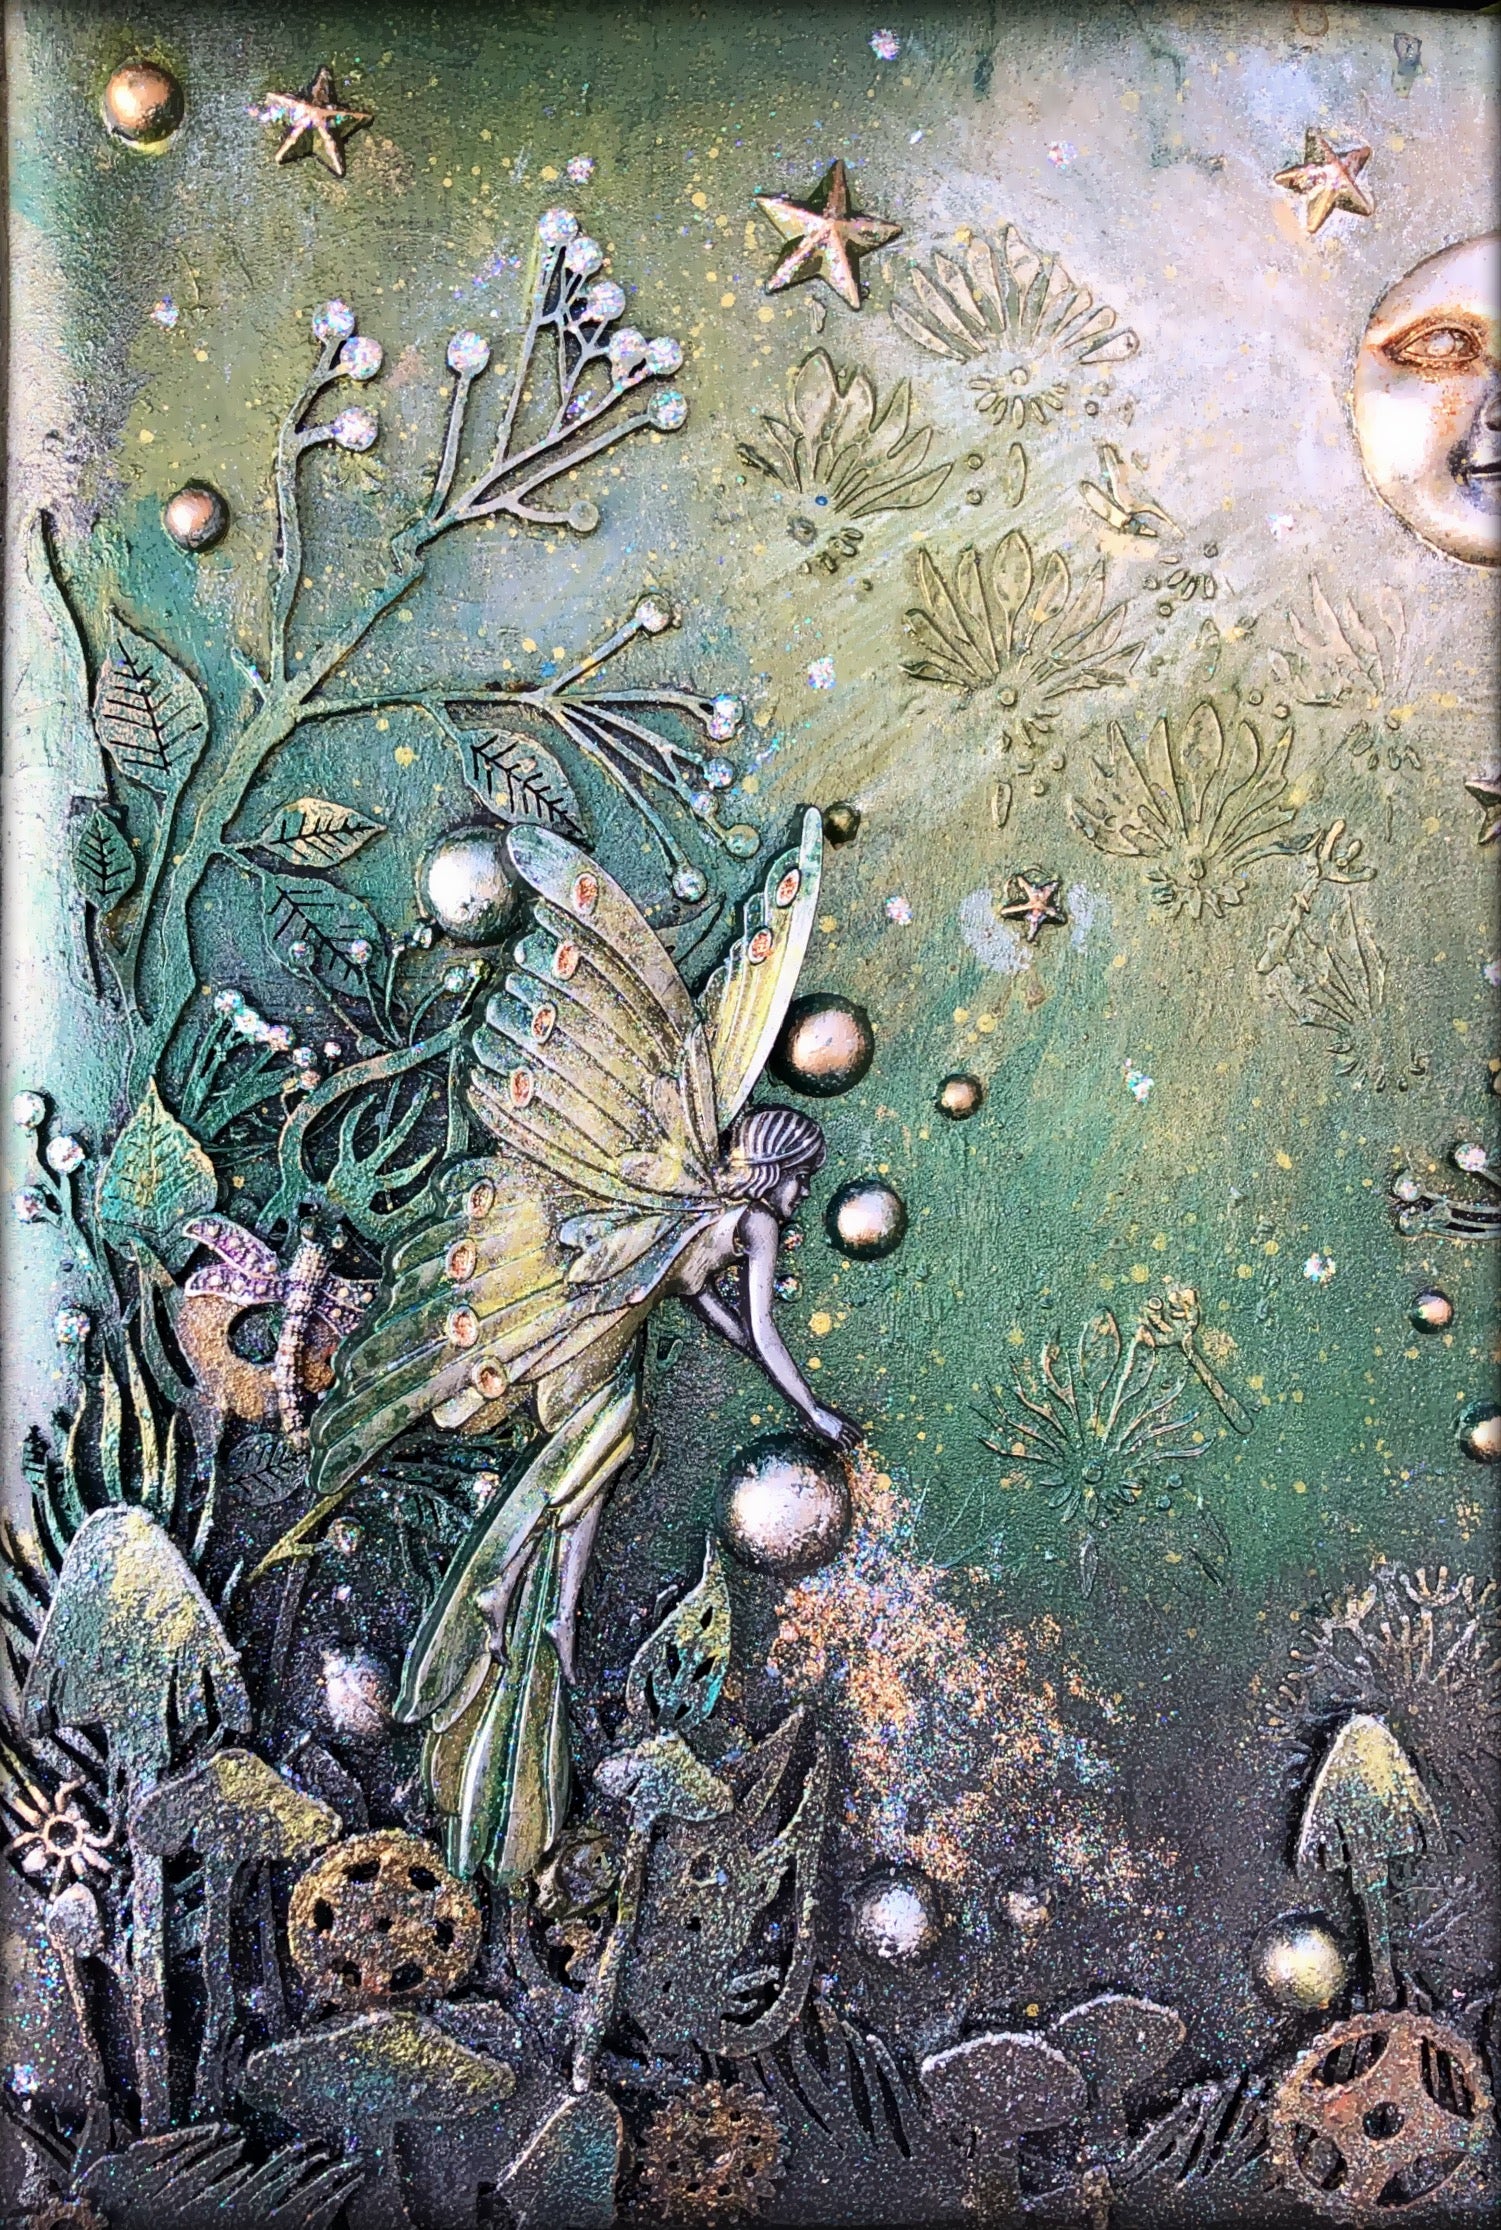
I’m sharing the cover with you today. It is really very heavy handed on the Dusty Attic chipboard and glitter lol.
I’ve always believed in magic, (well perhaps believe isn’t really the word lol but in my imagination I believe.) but despite that, I’m not usually a fairy and glitter sort of person but I think I am softening in my old age.
To get this album cover effect, I glued all my chipboard and embellishments on in layers to create a sort of 3 dimensional effect. Then I painted over everything in black gesso. I used a big brush for most of it but took a small brush to get into all the nooks and crannies.
Once it was dry I created a sort of ombré effect buy graduating shades of colour. As I wanted it to appear as if all the light was coming from the moon, I started dark at the bottom of the page and got lighter as I went up.
I added metallique waxes to make the moon “shine” and to highlight all the edges of the embellishments as if the moonlight was catching them.

I painted the fairy separately but in a similar method. Black gesso first then a small brush to paint in the colour of her dress and wings. She is cast in quick set resin from a Stamperia mould. I’m sure Janine could order one in for you if you ask.
I glued her into place and then went nuts with glitter.
Sadly none of the metallique paints, waxes or the glitter, can show up as sparkly in a photo so you will just have to take my word for it that it is a very sparkly twinkly page…
I hope this helps you see just how versatile Dusty attic chipboard is. I can go from using one single embellishment on a card all the way up to “chipboard overload” depending on what I am making at the time.
PRODUCTS USED:
The Dusty Attic products:
Finnabair Products:
I also used the Fairy "sleeping beauty" mould from Stamperia. If it is not in stock, I'm sure Janine will order it in for you. It is a lovely mould.
easy to paint if you apply a primer or some gesso first. In this instance, I used clear gesso.


Comments
Leave a comment